If you’ve ever walked down the beauty aisle, you’ve probably grabbed a lip gloss tube that felt smooth, pigmented just right, and stayed put for hours. What you might not see is the quiet craft that goes into filling that tube—especially if you’re using a high-quality lip gloss base (that’s where I come in, as a supplier who works with small indie brands and big beauty lines alike). A lot of people think filling a lip gloss tube is just squeezing goop into a container, but skip the small, science-backed steps, and you’ll end up with leaked gloss, streaky application, or tubes that crack before their shelf life. Today, I’m pulling back the curtain on how to fill a lip gloss tube with base the right way—no fancy lab degree required, just attention to detail and a supply partner that has your back. Lip Gloss Base
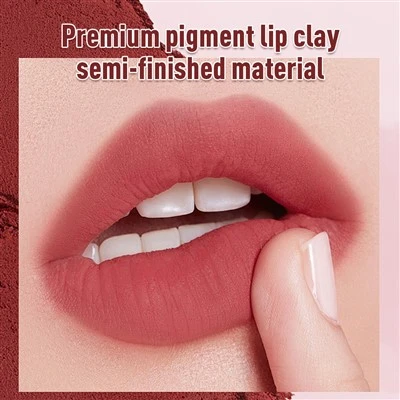
First, let’s talk about why the base matters. Not all lip gloss bases are created equal. When I supply base to customers, I emphasize that this is the foundation: it’s what gives the gloss its slip, shine, and staying power, plus it’s the mix of emollients (like jojoba oil, vitamin E, or squalane), thickeners, and preservatives that keep the formula safe and consistent. If your base is too runny, it will leak out of the tube before you even get it on your lips; too thick, and it will clump when applied. That’s why, before you even touch a tube, you’ve got to prep your base and your workspace—two steps that separate amateur mishaps from professional results.
Let’s start with base preparation. I always tell new customers to start with their base at the exact temperature specified on the product’s COA (Certificate of Analysis). Most lip gloss bases work best at 120°F to 130°F (49°C to 54°C) — warm enough to flow smoothly, but not so hot that it will warp plastic tubes or melt any additives you might be mixing in (like glitter or flavor oils). I recommend using a double boiler to heat the base evenly, never a microwave, because microwaves create hot spots that can degrade the base’s ingredients and lead to inconsistent texture. Stir the base slowly with a silicone spatula until it’s completely homogenous—no streaks of thicker or thinner product. If you’re adding colorants or extras (like shimmery pigments), wait until the base is at its target temperature, then mix in a small batch first to test consistency: if it pours like warm honey, it’s ready. If it’s more like molasses, let it warm a minute more; if it’s watery, you might have overheated it (and can fix it by adding a tiny bit of cold base, if you have extra).
Next, prep your workspace and tubes. This is a step I see beginners skip all the time, and it leads to 90% of their filling problems. Lip gloss tubes need to be completely clean and dry before filling—any leftover water, soap residue, or dust will mess with how the base adheres, and can even cause mold if you’re using a water-based base. I always advise my customers to wash their tubes with isopropyl alcohol (70% concentration works best) and let them air dry on a lint-free towel for at least 15 minutes. No paper towels here—they leave tiny fibers that will get stuck in your gloss. For extra smoothness, wipe the inside of the tube with a sterile cotton swab dipped in alcohol, too. Also, make sure your tubes are at room temperature, not cold straight out of a box; cold tubes will cause warm base to thicken instantly around the edges, leading to air pockets when you fill them. I keep a stack of tubes on my supply desk, and before every fill, I run my hand along the side to make sure they’re not chilly.
Now, the filling method itself—this is where precision counts, and where having the right tools makes all the difference. You can’t use a regular squeeze bottle; too much pressure will push air into the base, and air pockets will lead to half-empty tubes or gloss that goes bad faster. The two most common tools I supply to my customers are a piston filler (for bulk production, 50+ tubes at a time) and a manual syringe-style filler (for small batches, 1 to 20 tubes). I’ll cover both, because many of my clients start small and scale up as they grow.
For small batches (1 to 20 tubes), a manual syringe filler is the way to go. This is the same tool you’d use for applying icing to a cake, sized for beauty products. First, load the warm base into the syringe: pull the plunger all the way back, then submerge the tip of the syringe into the base, slowly releasing the plunger to draw the base in until it reaches the volume you need. For standard 0.2 oz (6 ml) lip gloss tubes, you’ll want to fill them to just below the opening (about 0.1 inches/2 mm below the rim) — that gives you space for the wand to sit without overflowing when you twist the cap on. Overfilling is the #1 mistake here; I’ve seen customers fill a tube to the brim, and when they cap it, the base squirts out all over their workspace and onto a finished batch of tubes. It’s messy, wasteful, and can ruin the labeling. Once the syringe is loaded, insert the tip gently into the tube, being careful not to scrape the sides (scraping can leave excess base that will dry and clog the wand later). Slowly push the plunger down to dispense the base, keeping the syringe tip steady against the bottom of the tube as you go—this pushes out air as you fill, so you avoid those annoying air pockets that leave your tube half-full at the bottom. When you reach the right volume, pull the syringe straight up, and you’re done with that tube.
For larger batches (50+ tubes), a piston filler is the next step, and it’s a tool I recommend investing in once you’re consistently making 10+ batches a month. Piston fillers work by drawing a precise volume of base into a cylindrical chamber, then dispensing it evenly into tubes, with no guesswork. The key here is to keep the base’s temperature consistent throughout the whole fill—warm base that cools down mid-batch will thicken, leading to inconsistent fill volumes. I suggest connecting a small heated blanket to the base storage bucket (or keeping the bucket in a heated water bath) to maintain that 120°F to 130°F temperature while you work. Also, space your tubes out on a stable rack so the filler can move smoothly between each one. Just like with the syringe, fill to 2 mm below the tube’s rim—this ensures when you insert the wand and cap it, there’s no overflow.
Wait, there’s one more step after filling, and it’s non-negotiable: degassing. When you’re drawing the base into the syringe or piston filler, small air bubbles get trapped in the formula, and if you cap the tube right away, those bubbles will rise to the surface, cool, and leave tiny holes in the gloss. That looks unprofessional and can make the wand feel clunky when you apply it. How to fix this? For small batches, take a sterile pin (or a toothpick that’s been sterilized in alcohol) and gently poke the surface of the base in the tube—each poke will pop a bubble, and you can do this until no more bubbles rise. For large batches, you can use a vacuum chamber to degas the whole batch of filled tubes in about 10 minutes, which is faster and more consistent for bulk production. I always tell my customers to do this within 5 minutes of filling—don’t wait for the base to cool, or the bubbles will set.
Once you’ve degassed, it’s time to insert the wand and cap the tube. This is another small step that makes a big difference. Take the wand (which is attached to the cap) and gently twist it into the base until it’s seated about halfway—don’t push it all the way to the bottom, that can trap more air. Then screw the cap on tightly, but not so tight that you strip the plastic threads. A tight cap prevents leaks and keeps dust out, but a stripped cap is a waste of a good tube. I always test a few tubes after filling: twist the cap, hold the tube upside down for 10 seconds, and if no base leaks out, you’re good. If it leaks, check if you overfilled, or if the cap wasn’t screwed on right—easy fixes for a small batch, but for a large batch, you might need to adjust your fill volume.
Now, let’s talk about common mistakes I see new customers make, because these are the ones that waste time and product, and I want to help you avoid them. First, not preheating your tubes. If you pull tubes straight from a cold warehouse into warm base, the base will solidify on contact, leading to thick spots and air pockets. Second, overheating the base. I’ve had customers microwave base for 2 minutes, and it scorches the ingredients, leading to a bad odor and a formula that separates. Always use a double boiler. Third, rushing the degassing step. Skipping this leads to a product that looks unpolished, which can hurt your brand’s reputation—if your customers see a tube with holes, they won’t trust your gloss. Fourth, mixing different base formulas. If you’re switching from a matte base to a shiny base, make sure you clean your syringe or piston filler completely between uses, or you’ll get streaky mixed formulas.
As a lip gloss base supplier, my job isn’t just to sell you base—it’s to help you make a product you’re proud of. I’ve worked with brands that start with 10 tubes and end up selling in 500 stores, and the one constant is that those brands paid attention to the small steps: prepping, precise filling, degassing. If you’re a small indie brand just starting out, don’t be afraid to test small batches first—use the syringe method, practice with a few tubes until you get the fill volume right, then scale up. If you’re a larger brand looking for a reliable base supply, I can help you customize a base that works for your formula, with consistent viscosity that makes filling easy every time.
Wait, let’s circle back to something important: safety. When working with lip gloss bases, you’re dealing with cosmetic-grade ingredients, so always make sure your workspace is clean, and all tools are sterile. If you’re adding colorants or flavor oils, make sure they’re also cosmetic-grade—ingredients meant for candle or soap making are not safe for lips. I always provide safety guidelines with every shipment of base, and I’m happy to answer questions about formula adjustments or filling processes, because my success depends on your success.
If you’re just starting out and feeling overwhelmed by all this, don’t be. Filling lip gloss tubes with base is a skill, not a rocket science, and once you do a few batches, it becomes second nature. The key is to take it slow, follow the temperature and volume guidelines, and don’t cut corners on the prep steps. That’s how you get a gloss that applies smoothly, doesn’t leak, and keeps your customers coming back.
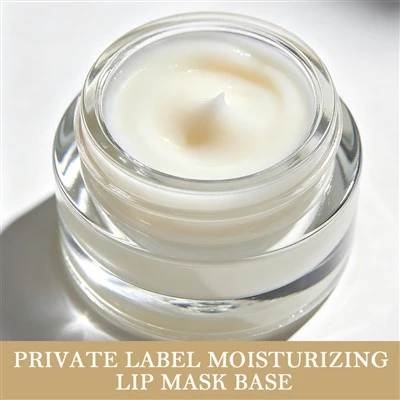
Whether you’re a small indie brand testing your first batch, or a established brand looking for a steady supply of high-quality lip gloss base, I’m here to help. I understand that as a beauty brand, your focus should be on creating products that connect with your customers—not troubleshooting filling issues or worrying about inconsistent base quality. That’s why I supply batches that are consistently tested for viscosity, purity, and stability, so you can focus on what you do best. If you’re ready to talk about your next order, need help adjusting your process, or want to learn more about custom base formulas, don’t hesitate to reach out. I’m here to support your brand every step of the way.
Eyeshadow Semi-Finished Material References
- Cosmetic Ingredient Review. (2022). Safety Assessment of Lip Gloss Ingredients. International Journal of Toxicology.
- Personal Care Products Council. (2021). Best Practices for Lip Product Manufacturing. PCPC Technical Guidelines.
- Rieger, M. (2020). Cosmetic Filling and Packaging: A Practical Guide for Small to Mid-Size Brands. Soap and Cosmetics Magazine.
- United States Food and Drug Administration. (2019). Cosmetic Labeling and Manufacturing Requirements. FDA Cosmetic Regulations.
Guangzhou Yishengheng Cosmetic Co., Ltd.
As one of the most professional lip gloss base manufacturers in China, we’re featured by high quality customized products. Please feel free to buy discount lip gloss base in stock here and get pricelist from our factory. Quality products and punctual delivery are available.
Address: Room 1003, 10th Floor, Building B, Suijin Center, No. 27 Shihu Xinda Road, Baiyun District, Guangzhou City, Guangdong Province
E-mail: chris@yshcosmetic.com
WebSite: https://www.yshcosmetic.com/
